Light gauge steel panel detailing from 2D plans
What light gauge steel panel detailing contains, how a 2D plan becomes panel drawings for the shop, and what to check before the roll-former runs.
Tony Huaulmé6 min read
What is light gauge steel panel detailing?
Light gauge steel (LSF, also called cold-formed steel or CFS) walls are built from thin steel sections: lipped channels for the studs, unlipped channels for the top and bottom tracks. Detailing is the work of deciding, for every wall, exactly which sections go where and drawing it so someone else can build it. The terms are defined in the framing glossary.
The output is a set of panel drawings, often called shop drawings or panel sheets. One panel, one drawing. A good one answers the questions a fitter asks at the bench: which member is this, how long is it, where does it sit, what is it fixed to, which way up does the panel go.
Detailing sits between design and production. Upstream you have a plan and a brief. Downstream you have a roll-former and an assembly table. The drawings are the contract between the two.
What does a panel drawing contain?
| Element | What the drawing shows | Why the shop needs it |
|---|---|---|
| Studs | Position, spacing, profile, length | Cut list and layout |
| Top and bottom tracks | Length, profile, joints | Cut list and panel width |
| Openings | Rough opening width and height, sill and head heights | Where the frame breaks |
| Opening framing | King studs, trimmers, head and sill members, short studs above and below | The most error-prone part of a wall |
| Reinforcements | Noggins or bridging, bracing, extra studs at corners and joins | Strength and stiffness before the panel is lifted |
| Service holes | Positions along the studs | Pipes and cables pass without cutting on site |
| Marks | A unique mark per member and per panel | Nobody guesses which piece goes where |
| Title block | Project, level, panel name, dimensions, steel weight, member count | Handling and traceability |
Two details deserve a word. The marks matter most. A drawing without marks forces the shop to read lengths off the plan and match them by eye. A drawing with marks lets the roll-former label each piece as it comes out. Then the opening framing. A window needs more than a hole: the head carries the load round the opening, the trimmers carry the head, the short studs above and below keep the lining and the fixings in line. This is where a missing member is most often found, late.
How do you go from a 2D plan to panel drawings?
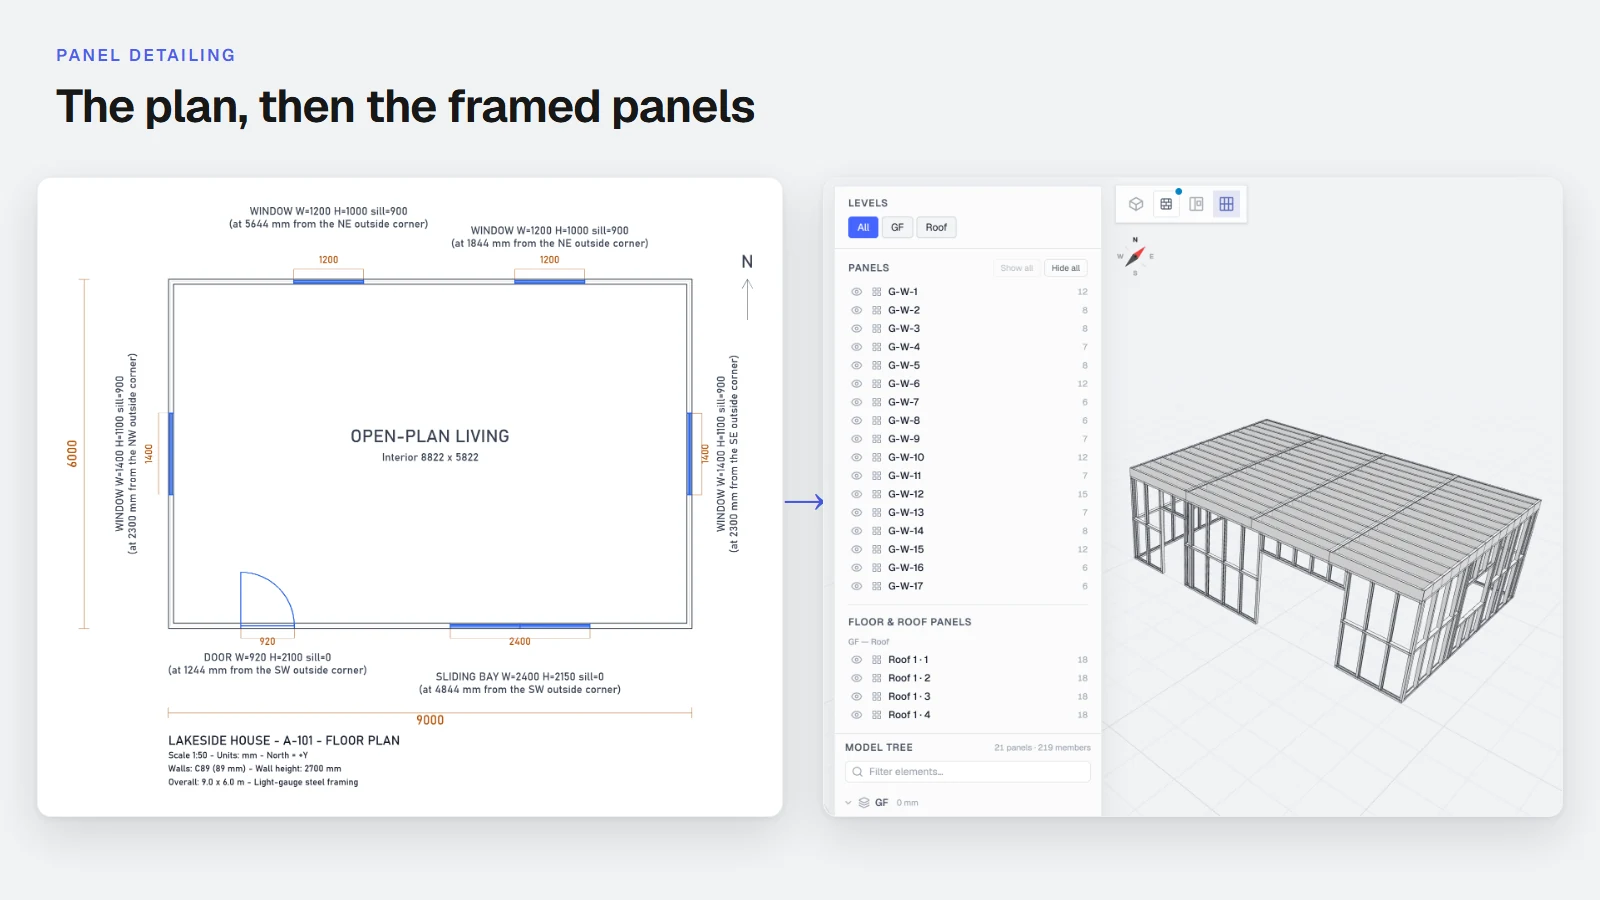
A 2D plan is not a detailing input on its own. It shows lengths and openings in plan view. It rarely gives wall heights, section sizes or where one panel ends and the next begins. So the path goes through a model.
- Read the plan. Take the clean plan of each level (DXF, PDF or an image of the plan) and read walls, openings and dimensions from it. Write down what the plan does not say.
- Build the model. Walls, levels, floors, roofs, with the heights and thicknesses you confirmed. This is where most errors are cheap to fix.
- Split the walls into panels. Decide the panel lengths from what the shop can handle, what the truck can carry and where the joints fall. Joints near openings are a classic source of trouble; see LSF wall panelization.
- Frame each panel. Place studs and tracks, frame the openings, add reinforcements, give every member its mark.
- Produce the sheets. One drawing per panel, plus a framing plan per level that shows how the panels fit together.
- Check, then release. Compare the sheets with the plan and with the model before anything is cut.
Done by hand, steps 2 to 5 mean redrawing the building in a CAD tool or a dedicated framing package. That is where the days go.
How do you choose the panel size?
Panel length is a compromise between three limits. The shop sets one: the table size and the lifting you have. The transport sets another: what fits on the truck, and how the panels are stacked. The building sets the last: where the openings are, where the walls meet and where the floors bear.
A few habits help. Cut panels at stud lines, not inside an opening. Keep openings away from panel ends so each trimmer sits in one panel. Prefer a small number of repeated panels to many one-offs: the shop learns the repeat and mistakes drop. And keep panel heights consistent within a level, so panels stack without surprises.
These are choices for your workshop, not rules, and a good model lets you change them and see the effect on the sheets instead of redrawing.
What should you check before the panels go to the shop?
Checking takes minutes if you know where to look.
- Opening sizes and positions. Compare each opening with the plan: width, height, sill height. One wrong sill height propagates to every short stud under it.
- Panel joints. No joint should fall inside an opening. Joints should land where the plan has a stud line or a return.
- Corners and junctions. Each corner and each wall-to-wall junction needs its extra studs. Count them in the drawing.
- Lengths against the machine. Longest members must fit what your roll-former and your table handle.
- Marks. Each mark appears once. Two members with one mark is a mistake waiting for the shop.
- Steel weight per panel. It should look sensible next to similar panels. A panel far lighter than its neighbours has often lost a member.
- Dimensions you did not give. If a height or a thickness came from nowhere in your brief or the plan, ask where it came from.
Where does Stud help with panel detailing?
Stud is an AI agent for builders who receive 2D plans. It follows the path above:
- It takes a DXF, a PDF, an image of a plan or a dimensioned sketch.
- It builds the 3D model, step by step, and you watch the model update. If a dimension is missing, it uses a standard value, notes it as an assumption and lists it at the end of the turn for you to keep or correct.
- It splits the walls into panels and then frames them in light gauge steel (or timber).
- You can click an element in the 3D view and ask for a change; the panels and the framing follow.
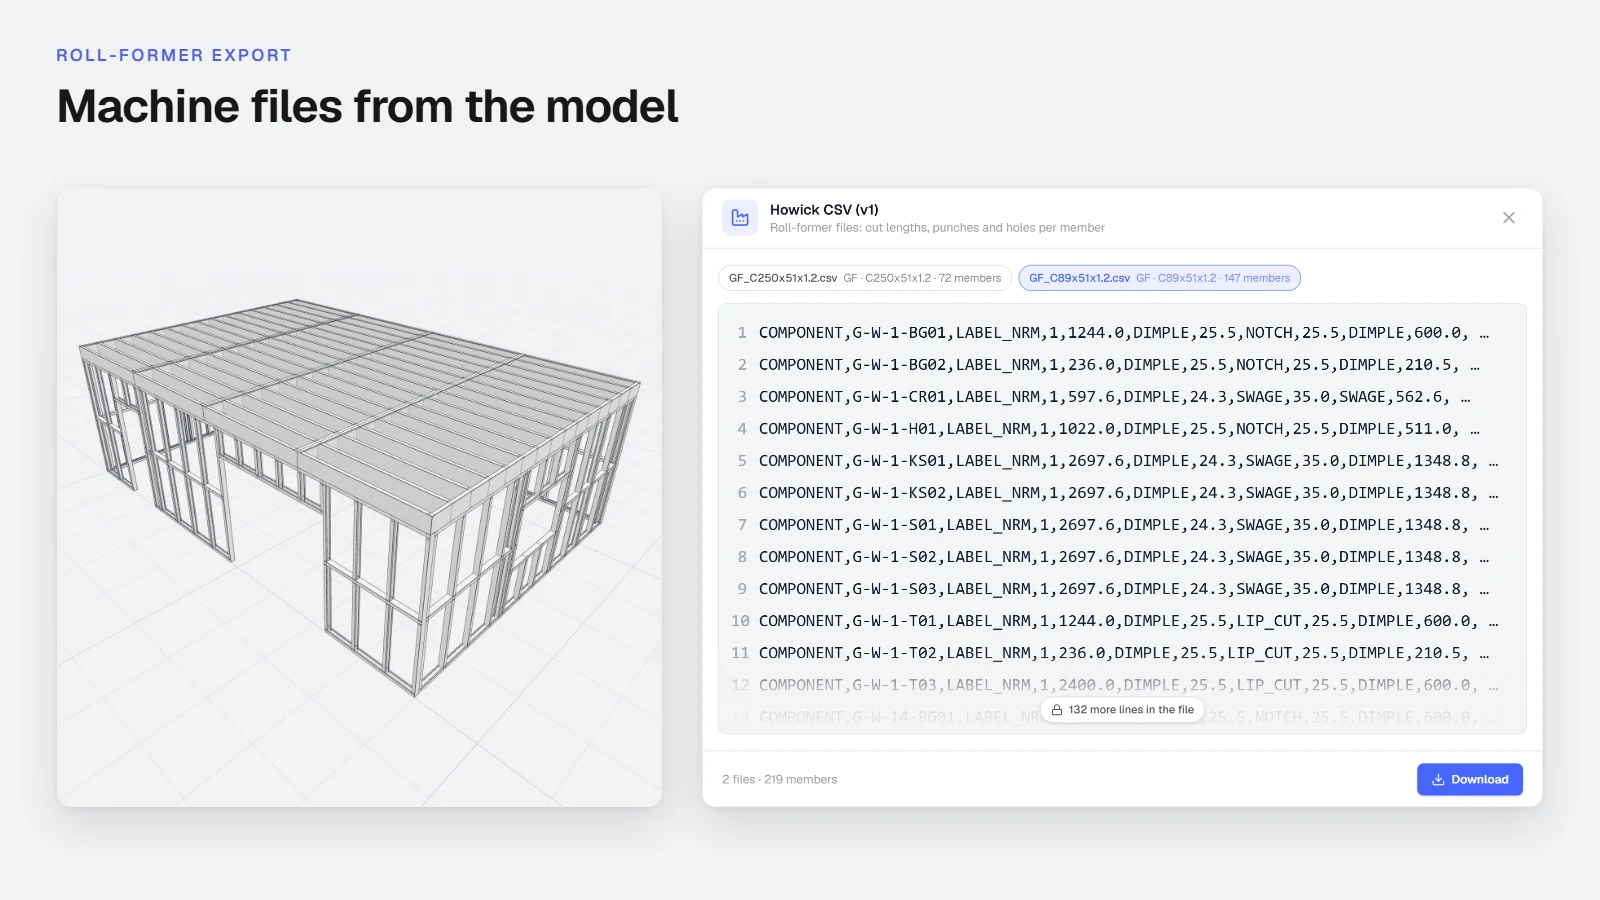
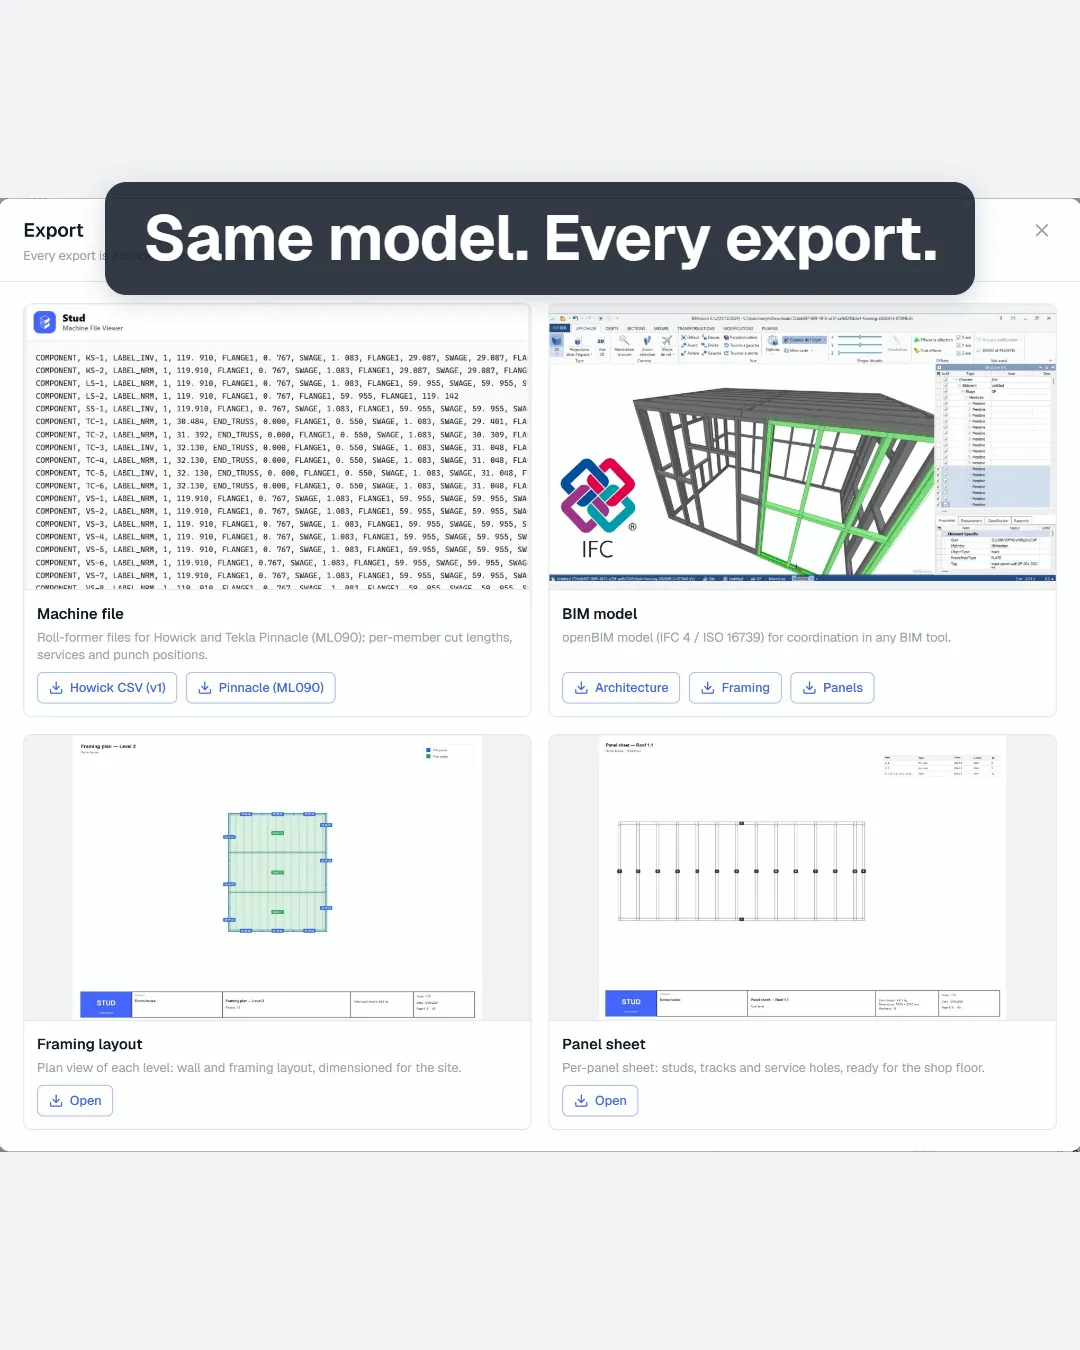
- In the Framer plan, it produces the production PDFs: the framing plan per level and the panel sheets, from the same model. Machine files for your roll-former come from the same model too, and we explain what they contain in roll-former machine files explained.
You stay in charge: you read the model and the sheets, and you decide what goes to the shop. Stud does not replace your engineer's calculations.
For the quantities side of the same model, see light gauge steel take-off from a plan. For the product page, see Stud for light gauge steel.
If you work in timber, the same questions apply with different members. The sister guide on timber frame panel shop drawings covers what a panel drawing holds in a timber frame workshop.
How do you start?
Pick one plan you already have. Open Stud on the free plan, attach the plan, write a two-line brief (building, roof, system) and check what the agent assumed. Then look at the framed model before anything else. Sign up and try it on your own plan.
Sources
- Wikipedia, Cold-formed steel (framing members: lipped channel studs fitting into unlipped channel tracks), checked 6 November 2026
- Wikipedia, Roll forming (holes and notches added in line on the forming line), checked 6 November 2026
Questions
What is panel detailing in light gauge steel?
It is the step between the plan and the shop floor. Each wall is split into panels, and each panel is drawn with its studs, tracks, opening framing, reinforcements and marks, so it can be cut, assembled and recognised in the shop.
Can I detail panels straight from a 2D plan?
Not without a model in between. A plan gives lengths and openings in plan view, not heights, thicknesses or the panel split. Those come from your brief or from the assumptions the agent lists for you to check.
Does Stud produce the panel sheets?
In the Framer plan, yes: panel sheets and the framing plan per level come out as production PDFs, from the same model as the 3D view. You read and check them before they go to the shop.